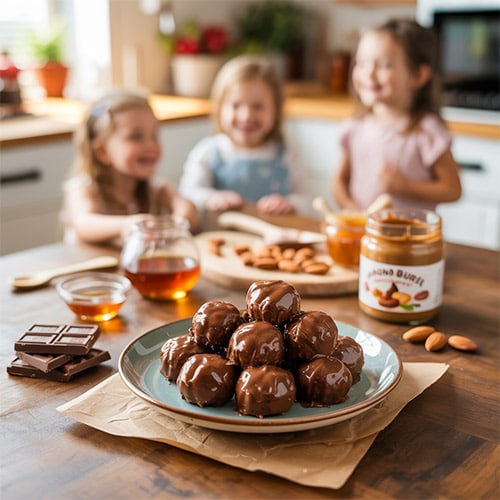
Hi there! I’m Ruby Elise, a mom of two, a mess-maker, and a chocolate cake lover.
When I first started baking gluten-free, I’ll be honest… most of my cakes turned out dry, flat, or just plain weird. My daughter once asked if I accidentally made brownies (I didn’t). And don’t get me started on the sunken middles and crumbly slices!
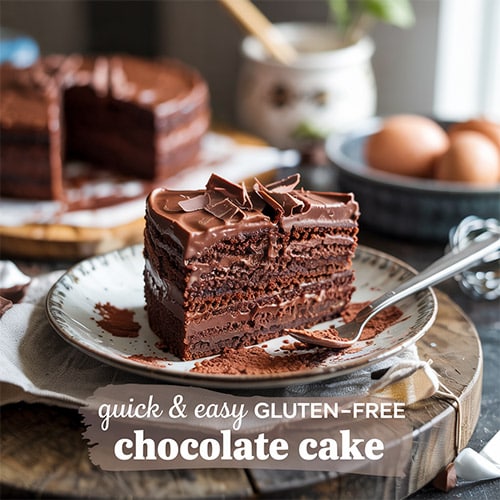
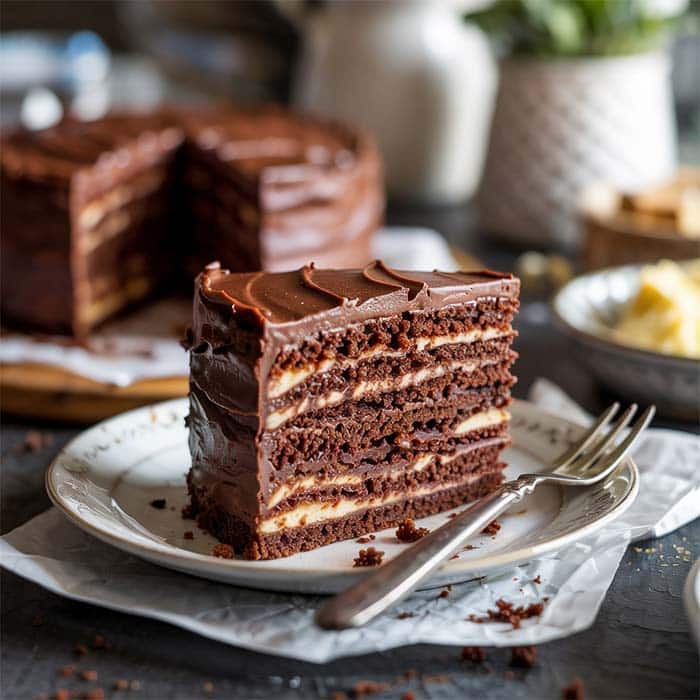
But after lots of flops and a few “nailed it” moments, I finally cracked the code. This gluten-free chocolate cake is soft, rich, and actually tastes like a real cake. It’s quick, easy, and picky-kid-approved. Best part? You only need one bowl and no fancy tricks.
Let’s make a chocolate cake everyone will love — no gluten, no stress, just delicious.
Ingredients You’ll Need
Let’s keep it simple and stress-free. I always have these ingredients in my pantry; if not, they’re easy to find at any local store. No weird flours or complicated swaps. Just good, basic stuff that works every time.
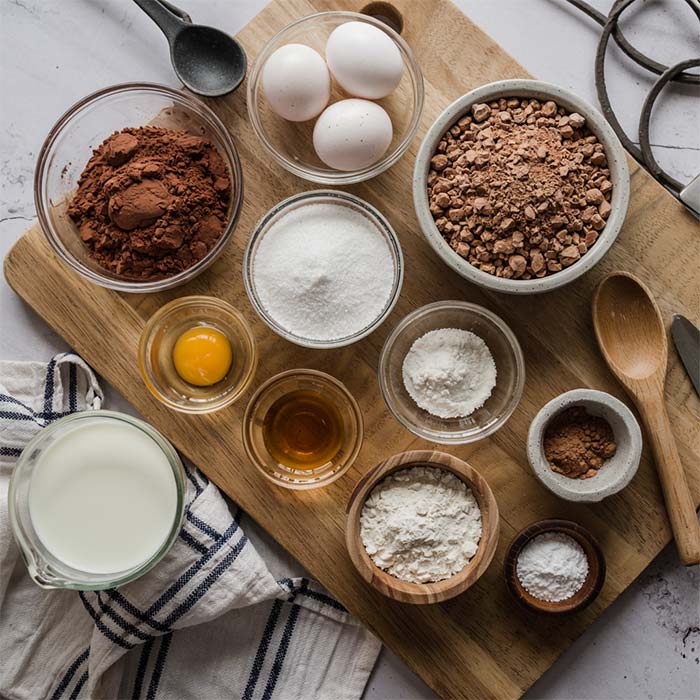
For the Cake
- Gluten-free all-purpose flour blend (1:1 with xanthan gum) makes all the difference. I’ve tested a few, but I always return to King Arthur or Bob’s Red Mill — they give the best texture without any grainy feel.
- Cocoa powder (unsweetened): Use good-quality cocoa for that deep, rich chocolate flavor. Trust me, it’s worth it.
- Granulated sugar: I use regular white sugar, but coconut sugar works, too, if you want something less processed.
- Baking soda & baking powder: These help the cake rise and stay fluffy.
- Salt: Just a pinch brings out all the chocolate goodness.
- Eggs: Room temperature is best. I once used cold eggs straight from the fridge — the cake came out a bit dense. Lesson learned.
- Milk (or dairy-free alternative): I’ve used almond, oat, and regular whole milk — all work great.
- Oil: I go for light-tasting oils like avocado or vegetable oil. Butter works too, but oil keeps it extra moist.
- Vanilla extract: A splash adds warmth and depth.
- Boiling hot water: Sounds strange, but this is the secret! It “blooms” the cocoa and makes the batter smooth and rich. Please don’t skip it.
For the Frosting (Optional)
Now, you can enjoy the cake without frosting (my kids sometimes eat it with a glass of milk). But if you’re going for wow, this simple frosting seals the deal.
- Unsalted butter (softened): Room temp is key here. Cold butter = clumps.
- Powdered sugar: For that classic sweet and fluffy texture.
- Cocoa powder: Because we’re not messing around — double chocolate.
- Vanilla extract: Just a little brings it together.
- Milk (or non-dairy): Add a bit at a time to get the consistency right — creamy but spreadable.
If you’re dairy-free, swap the butter with vegan butter sticks. I’ve done it many times, and it turns out just as dreamy.
How to Make This Gluten-Free Chocolate Cake (Step-by-Step)
Don’t worry — if you’ve got a bowl, a whisk, and about 10 minutes, you’re good to go. This is the kind of cake that doesn’t need a fancy mixer or tons of cleanup. Just mix, bake, and enjoy. Here’s precisely how I do it in my kitchen, usually with one kid helping and the other trying to lick the bowl.
Step 1: Preheat & Prep
First things first — set your oven to 350°F (175°C). Give it time to fully heat up while you get everything else ready.
Then grab your cake pan. I usually use a 9-inch round or square pan, but this recipe is flexible. Lightly grease or line it with parchment paper so nothing sticks (been there, scrubbed that).
If your house is as busy as mine, measure all your ingredients before mixing. It’ll save your sanity when little hands try to “help.”
Step 2: Mix Dry Ingredients
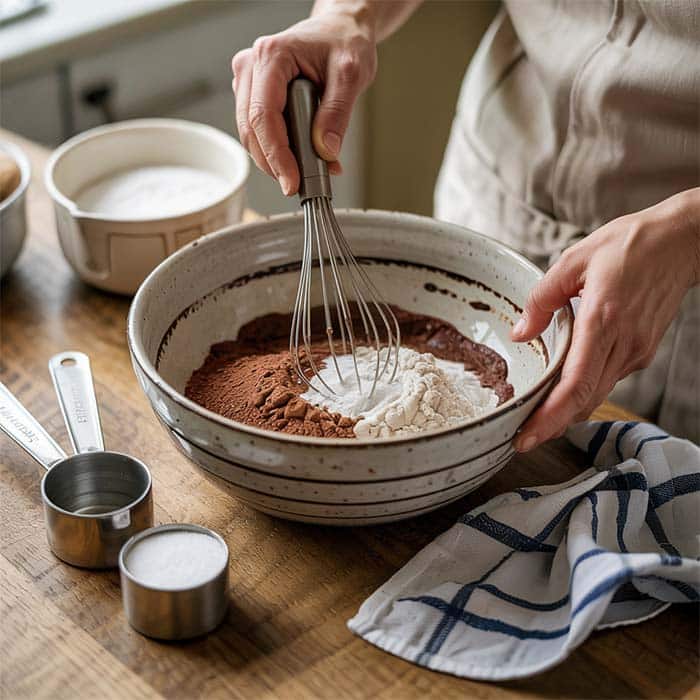
In a large mixing bowl, whisk together:
- 1 ½ cups gluten-free all-purpose flour
- 1 cup granulated sugar
- ½ cup unsweetened cocoa powder
- 1 teaspoon baking soda
- ½ teaspoon baking powder
- ¼ teaspoon salt
Make sure there are no lumps, especially in the cocoa powder. I once skipped this part and ended up with bitter clumps in a few slices — not fun. Whisking it well makes the batter smooth and the cake texture just right.
Step 3: Combine Wet Ingredients
In a separate bowl (or a big measuring cup), whisk together:
- 2 eggs
- 1 cup milk (or any non-dairy milk)
- ½ cup oil
- 2 teaspoons vanilla extract
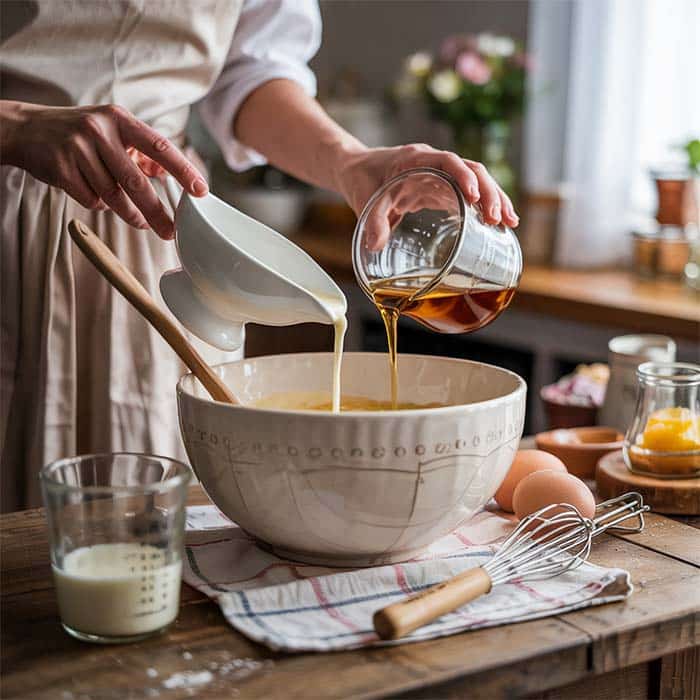
Once that’s smooth, slowly stir in 1 cup of boiling hot water. Yes — boiling. I know it seems strange, but this step is magic. It deepens the chocolate flavor and helps the batter stay moist and light. The mix will look a little thin — don’t worry, that’s exactly how it should be.
I used to skip the water because it sounded odd… and my cakes were always a bit dry. So now I never leave it out.
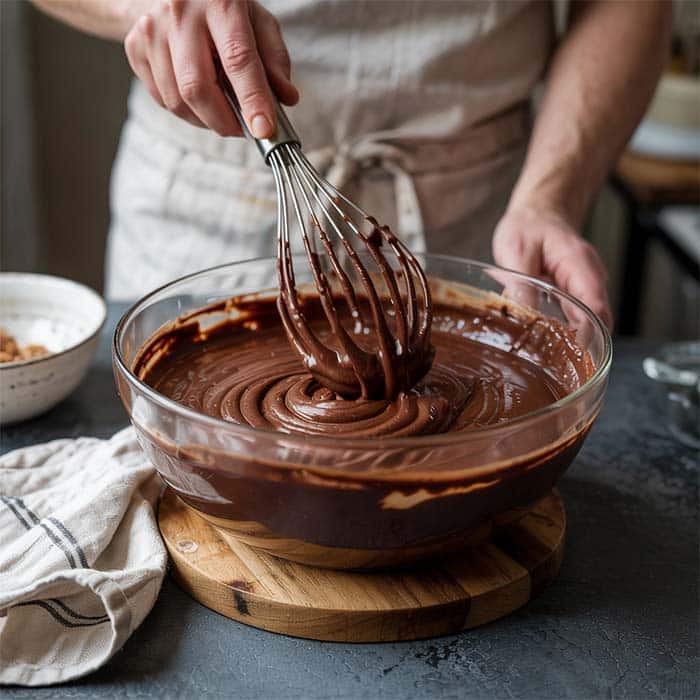
Step 4: Mix Together & Bake
Pour the wet mixture into your bowl of dry ingredients. Gently whisk everything together until it’s smooth and no flour streaks. Don’t over-mix — just enough to bring it all together.
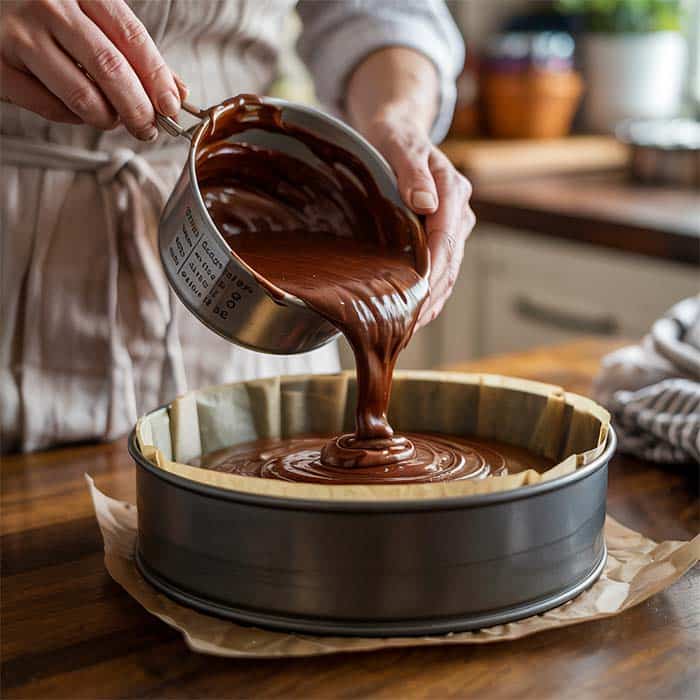
Pour the batter into your prepared pan. It’ll be thin, but that’s good. Pop it into the oven and bake for 30–35 minutes, or until a toothpick comes out clean (or with just a few crumbs).
Here’s my real-life tip: Start checking around the 28-minute mark. Every oven’s different, and you don’t want to overbake. I’ve done it before and regretted every dry bite!
Let the cake cool in the pan for about 10 minutes, then transfer it to a wire rack to cool completely before frosting.
Step 5: Frost, Slice & Enjoy!
Once the cake is cool, leave it as-is or go all-in with the frosting. I usually whip up my simple chocolate buttercream and spread it over the top — thick, creamy, and sweet enough.
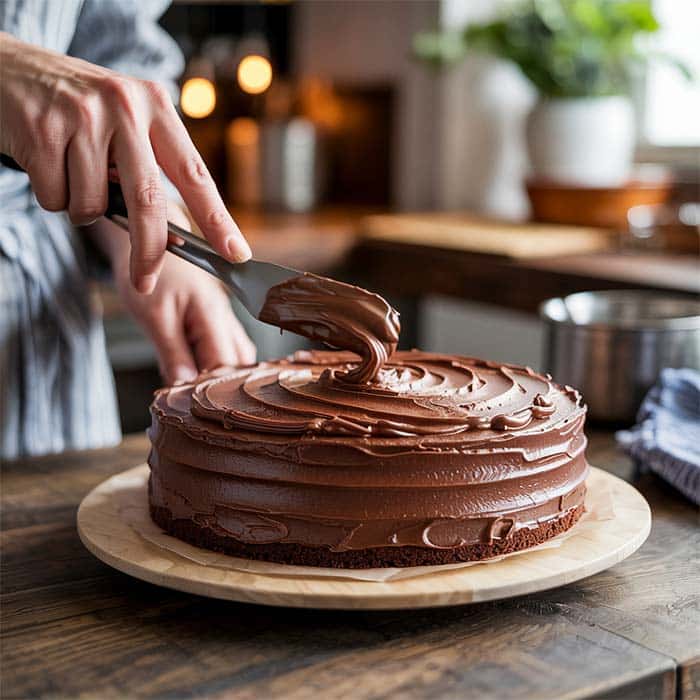
If it’s a birthday, I’ll throw on some sprinkles. If it’s a random Tuesday, we enjoy it with a scoop of vanilla ice cream or a glass of cold milk.
And yes — this cake disappears fast in our house. My daughter says it’s her “happy cake,” and I agree.
Expert Tips for Perfect Texture Every Time
I’ve made this cake more times than I can count — for birthdays, bake sales, and honestly, just because. Along the way, I’ve learned a few simple things that make a big difference in how your cake turns out.
Use room-temperature eggs and milk. Cold ingredients can make the batter clump and affect how the cake bakes. I like to take mine out about 20 minutes before starting — or, if I forget (which happens often), I warm the eggs in a bowl of warm water for a few minutes.
Boiling water is a game-changer. It might sound odd, but this gives the cake that rich, moist texture. It helps the cocoa powder bloom and makes the batter smoother. Just trust me — don’t skip it.
Don’t over-mix the batter. Once everything is combined, stop mixing. Over-mixing can make the cake dense and rubbery instead of soft and fluffy.
Let the cake cool completely before frosting. I know it’s tempting to rush (especially when your kitchen smells like chocolate heaven), but frosting a warm cake leads to a melted mess. Been there. Wait it out — it’s worth it.
Test your oven. Every oven has its own personality. If your cake browns too quickly or sinks in the middle, it might be your oven temperature. I keep a small oven thermometer inside mine just to be sure.
Best Gluten-Free Flour Blends for Baking
Let’s talk flour about r because not all gluten-free blends are created equal.
I’ve tested quite a few over the years, and here are the ones that consistently give me the best results:
Bob’s Red Mill 1-to-1 Baking Flour: This is my go-to. It already has xanthan gum in it, which saves an extra step. It bakes up soft and holds moisture really well.
King Arthur Measure for Measure: Another great one. It’s light, not gritty, and perfect for cakes.
Cup4Cup: It’s pricier, but it’s worth it if you’re baking for a special occasion. The texture is almost identical to regular cake flour.
Homemade blend (if you’re feeling adventurous): I’ve made my own mix a few times with rice flour, tapioca, and potato starch — but honestly, with two little ones running around, I usually stick with store-bought blends that work.
A quick tip: Always check if your blend contains xanthan gum. If it doesn’t, you’ll need to add about ½ teaspoon per cup of flour to help with structure and texture.
Storage Tips & Make-Ahead Options
One of the things I love about this cake (besides how good it tastes) is how well it keeps. Life with two kids is unpredictable — so if I can bake once and stretch it over a couple of days, I call that a win.
Room temperature: If it’s not frosted, I cover the cake tightly with foil or wrap it in plastic wrap and leave it on the counter. It stays moist for up to 2 days — though, in our house, it rarely lasts that long.
Frosted cake: Once you add frosting, it’s best to keep it in the fridge. I store it in an airtight container or cover it with a cake dome. It’ll stay fresh for 3 to 4 days, but let it sit out before serving so the frosting softens up.
Freezing: Yes, you can freeze it! I’ve done this before birthday parties, and it’s a total lifesaver. Wrap individual slices or the whole (unfrosted) cake in plastic wrap, then foil. Pop it in the freezer for up to 2 months. When you’re ready, thaw at room temp — and it’s just as good as fresh.
Make-ahead tip: Sometimes, I bake the cake a day early, let it cool, then wrap it tightly and frost it the next day. It helps the flavor deepen, and the cake holds its shape better.
So don’t stress if you’ve got leftovers or need to prep ahead — this cake is forgiving.
That’s it — a rich, fluffy, gluten-free chocolate cake that’s easy to make and even easier to love.
It’s my family’s favorite for a reason, and I hope it becomes a go-to in your kitchen too. If you try, I’d love to hear how it turns out!